
Apollo 600 Operating Instructions
Prior to operation, the helmet, breathing tube, air supply hose, air entry ports and fittings must be thoroughly inspected and cleaned of all dust and debris. Also inspect the helmet suspension and adjust it if necessary (Adjustments see section 7.2).
The following steps have to be carried out before using the helmet:
(1) Air supply. |
|
(2) Check air pressure. |
Pressure must be set with the respirator connected. |
(3) Check equipment. |
|
(4) Check air supply hose. |
|
(5) Put the respirator on. |
|
Adjustments
7.1 New Control Valve
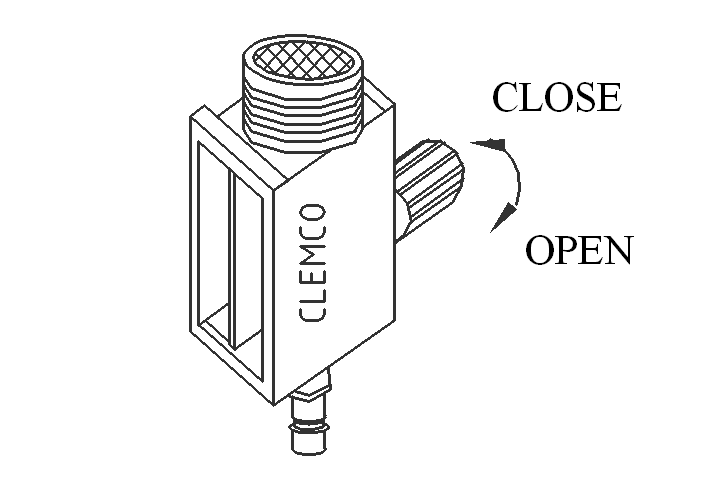
Picture 1: New control valve
Clemco’s Air Control Valve allows the user to increase or decrease the volume of breathing air while wearing the supplied air respirator. To regulate it the knob on the side has to be turned.
If connected properly to the air supply the valve allows the breathing air to be adjusted to between 160l/min to 400l/min.
7.2 Adjustment of Suspension Assembly

Picture 2: Suspension
The following steps have to be carried out before using the helmet:
(1) Remove Cape. |
|
(2) Adjust suspension. |
Adjust suspension by rotating the knob to fit your head size. Turning clockwise à suspension gets narrower; turning anti-clockwise à suspension gets wider. |
(3) Adjust chinstrap. |
Adjust chinstrap to correct length by moving the buckle. |
(4) Re-attach cape. |
The suspension maintains a fixed distance between the head and the helmet. The suspension must be properly installed and adjusted to provide the protection and comfort for which the helmet is designed.